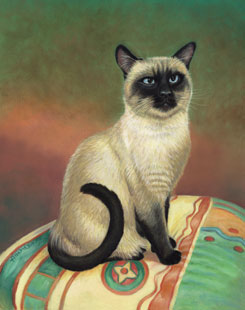
How to Paint Cat
Easy Oil Painting Techniques
|
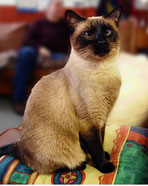
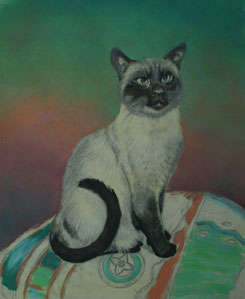
| This is a photograph of a Siamese Cat name Siegfried. Good reference photograph is important to capture the likeness of the model. Let’s begin the challenge! |
 |
| 1 |
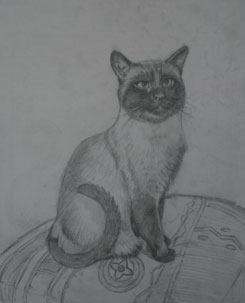 |
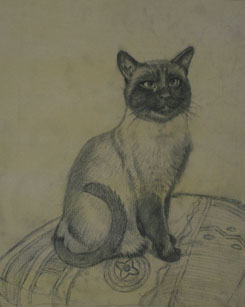
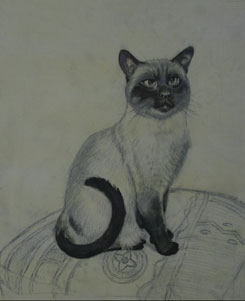
Sketching:
Sketching is the backbone of the painting. If you fail to be precise in this stage, you will have to make too many adjustments later.
I use an ordinary HB pencil to outline the drawing and add tones. After the sketch is completed, I lightly spray it with fixative to protect the pencil from smudging. |
| 2 |
 |
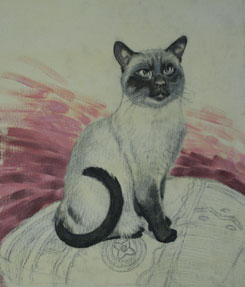
The Ground Color:
Glaze the whole canvas with the subjects middle tone (pale yellow ochre acrylic), it dries quickly, protects the drawing from smudging and eliminates the brightness of the canvas. |
| 3 |
 |
Blocking and Blacks:
Blocking and Blacks: The paints begins, I start painting the darks mixing burnt umber + vermillion + cobalt blue. With this three color combination, it created a softer blacks rather that using solid ivory blacks that creates unevenness and holes on the canvas but it gives depth when it was used in the pupils of eyes. Blocking determines the weight composition of the lowest value. |
| 4 |
 |
| Painting the Background:
Color contrast is important. I want to make certain that at the end of the painting, my colors will have a sense of harmony and my main subject will stand out.
I choose both warm and cool colors for the background and repeated some of the colors from the pillow.
|
| 5 |
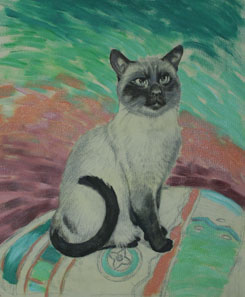 |
Color Balance:
• Hot colors: - red, orange and yellow
•Cool colors: - blue and green
|
| 6 |
 |
Color Blending:
I start to lend the background using a fan brush for softer and more subtle effects and to eliminate brush strokes.
|
| 7 |
 |
Tone Gradation:
Tone gradation is a technique that I use in my paintings because it creates a gradual passing from one tint or shade to another |
| 8 |
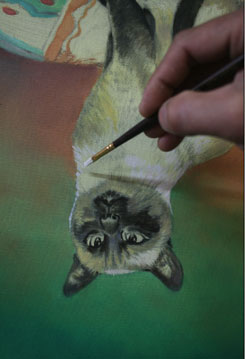 |
Painting
Upside Down:
Why paint upside down? This technique will stop you from concentrating on the image as a whole and enable you to focus more on the tones and brush strokes.
|
| 9 |
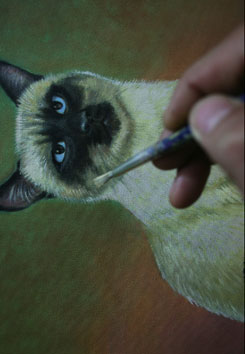 |
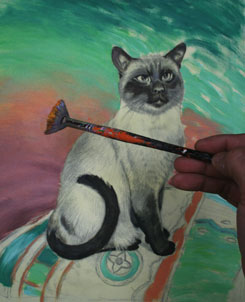
Detailing:
Learning how to properly use your brushes is important.
I use a big broad brush in the beginning to cover large areas of the canvas,then switch to my medium sized brushes, to my fine detailing brushes.
I continue the glazing of colors to give more depth to the painting.
.
|